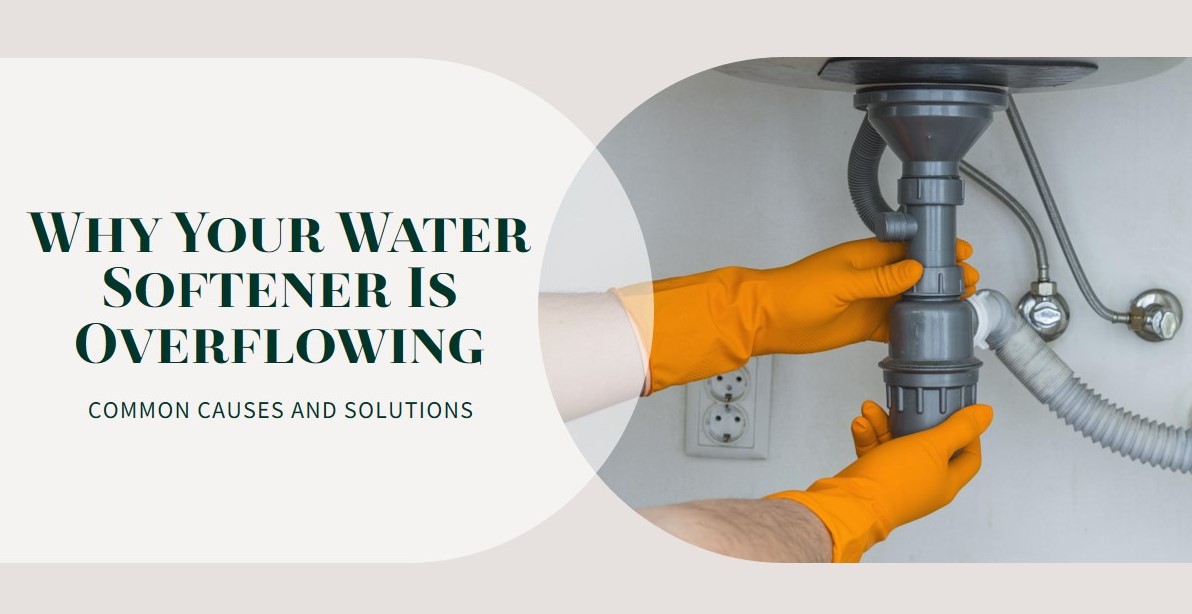
If you’ve noticed water pooling around your water softener tank or brine tank, your unit is likely overflowing. An overflowing water softener can lead to water damage, flooding, and costly repairs if left unchecked.
In this comprehensive guide, we’ll cover the common causes of water softener overflows, how to diagnose the issue, steps for fixing an overflowing softener, and tips to prevent future overflows. With the right information, you can troubleshoot this problem and restore your water softener to working order.
What Causes a Water Softener to Overflow?
Water softeners are complex appliances that remove minerals like calcium and magnesium from hard water. During the softening process, a brine solution regenerates the unit’s resin beads so they can continue trapping hardness minerals.
If any part of this process gets disrupted, water can back up and overflow the brine tank or main resin tank. Here are the most common culprits:
Clogged Drain Line
The drain line carries wastewater away from the softener during backwashes and regeneration. If sediment, sludge, or debris blocks this drain hose, water has nowhere to go. The excess can bubble over the tanks.
Signs of a clogged drain line:
- Water pooling around the softener
- Slow draining after regeneration
- Gurgling noises from the drain line
Plugged Brine Line
The brine line is the tube that allows brine from the salt tank to flow into the resin tank during regeneration. If scale, salt bridges, or debris clog this line, the softener can’t draw brine and may overflow.

Signs of a plugged brine line:
- Salt tank overflowing
- Softener not regenerating properly
- Weak or intermittent brine flow
Faulty Control Valve
The control valve directs the softening process by opening and closing on a timed schedule. Malfunctions like sticking valves, broken gears, or electrical issues can lead to uncontrolled water flow and overflowing tanks.
Signs of a faulty control valve:
- Irregular regeneration cycles
- Constant water flow in or out of the softener
- Failure to regenerate properly
Damaged Float Assembly
The brine tank float rises with the water level to shut off the refill valve when the tank is full. If the float gets stuck, bent, or detached, it can’t stop the water flow and the tank will overflow.
Signs of a damaged float assembly:
- Brine tank overflowing
- Uncontrolled water flow into the brine tank
- Float that’s off-center, crooked, or loose
Low Salt Level
Sufficient salt in the brine tank is required for softener regeneration. If the salt runs out, the unit can’t fully regenerate the resin beads. This results in hard water bypassing into your pipes and supply.
Signs of a low salt level:
- Increased scale buildup
- Tap water seems hard again
- Salt tank less than 1/3 full
How to Diagnose the Cause of a Water Softener Overflow
Pinpointing the cause of a water softener overflow takes some strategic troubleshooting. Here are tips for sleuthing out the issue:
Check the drain line first. The drain line is the most likely culprit for softener overflows. Inspect along the length of the hose for flattened sections, kinks, or clogs from sediment buildup. Check where it connects to the brine tank and make sure it’s clear.
Inspect the brine line. Disconnect the brine line from the softener and salt tank. Look for obstructions or scale blocking the flow. Test for strong suction when you reconnect it. Weak suction indicates a clog.
Examine the control valve and float. Rule out mechanical failure by checking the control valve and float for damage. Make sure the float moves freely and the valve cycles on schedule.
Monitor the regeneration cycle. Observe the unit at night during regeneration. An overflow here indicates that the control valve or float aren’t functioning properly.
Check the salt level. Verify that the salt tank is at least 1/3 full at all times. Improper salt levels are a common cause of poor softener function.
Review recent water usage. Large demands on your well or municipal supply can sometimes overtax a softener and lead to overflowing.
Consider recent softener service. Problems like incorrect float height or valve programming changes could cause water backup after a repair or servicing.
If you’re still unable to determine the cause after checking these items, contact a certified water treatment technician for diagnosis help.

How to Fix an Overflowing Water Softener
Once you’ve diagnosed the issue causing water overflow, here are steps for resolving some common water softener problems:
For a Clogged Drain Line:
- Shut off water to the softener and depressurize the system.
- Detach the drain line from the softener and brine tank.
- Run a drain snake through the line to loosen any debris and clogs.
- Flush clean water through the line to clear obstructions.
- Reattach the drain line and confirm it drains properly.
- Slowly turn the water back on and check for leaks.
For a Plugged Brine Line:
- Shut off water and disconnect power to the softener.
- Remove the brine line from the softener and salt tank.
- Clean scale or debris out of the line with a pipe brush.
- Blow compressed air through the line to clear any remaining clogs.
- Reattach the brine line and check for proper suction.
- Restore power and water to the softener.
For a Faulty Control Valve:
- Shut off water and power to the unit.
- Open the softener control head. Check for damaged gears or solenoid.
- Remove and clean the valve, or replace defective parts.
- Reset valve positions and ensure proper control sequence.
- Restore power and water. Test valve operation and control cycles.
For a Damaged Float Assembly:
- Shut off the water and depressurize the brine tank.
- Remove and inspect the float – repair or replace as needed.
- Check the refill valve operation and set float height.
- Reinstall float and reattach the brine line.
- Slowly restore water flow and check for proper operation.
For Low Salt Level:
- Add salt to the brine tank, filling to within a few inches of the top.
- Initiate a manual regeneration cycle to fully flush the softener.
- Test your tap water to confirm softness is restored.
- Schedule a regular time to check and replenish salt levels.
How to Prevent Future Water Softener Overflows
Once you’ve addressed the immediate problem, take steps to prevent future overflows:
- Inspect and clean the brine line and drain line every 6 months.
- Check the salt level weekly and refill as needed.
- Manually activate regeneration cycles if demand is high.
- Have a technician service the control valve and float yearly.
- Install an overflow bypass tube to direct water away from the softener.
- Adjust brine draw and refill rates to optimal levels.
- Upgrade older models to demand-initiated regeneration.
- Limit water use during the regeneration cycle at night.
- Keep the softener indoors to prevent freezing and damage.
When to Call a Professional for Your Water Softener
With routine maintenance, you can handle many water softener issues yourself. However, it’s best to call a professional for:
- Softener overflowing frequently
- Drain or brine line that won’t unclog
- Control valve repairs needed
- Replacing a damaged resin tank
- Programming and installation issues
- Softener not functioning after troubleshooting
A certified plumber or water treatment technician has the expertise to correctly diagnose and fix stubborn softener problems. They can also optimize your softener settings and performance.
An overflowing water softener is usually caused by a clogged line, valve defect, or insufficient salt. Inspecting the drain line, brine line, control valve, float, and salt levels allows you to isolate the problem. Routine maintenance also prevents many overflows. With some basic troubleshooting and DIY repairs, you can stop the overflow and minimize water damage. For complicated issues or overflows that persist, seek assistance from a water treatment professional.
Causes of Water Softener Overflowing
Water softeners are helpful appliances that remove minerals from hard water, preventing scale buildup and soap scum in your home’s pipes and fixtures. But when a water softener overflows, it can lead to water seeping across your floor and potential damage. Understanding why your softener is overflowing is the first step toward diagnosing and resolving the issue.
Clogged Drain Line
The drain line carries wastewater away from the softener during its regeneration cycles. Sediment, sludge, and debris can clog the drain line over time. If the drain line becomes blocked, the wastewater has no place to go and will back up, overflowing the brine tank.
Signs of a clogged drain line include:
- Water pooling around the softener
- Very slow draining after regeneration cycles
- Gurgling noises from the drain line
To fix, you’ll need to disconnect the line and clear any obstructions with drain snakes or pressure. Installing a brine tank overflow safety tube will redirect water away from the softener if overflows occur in the future.
Plugged Brine Line
The brine line brings salty water from the brine tank into the resin tank during regeneration. Scale buildup, salt bridges, and debris can clog the brine line. If the brine can’t flow freely through this tube, the softener may not regenerate fully and water can back up.
Signs of a plugged brine line include:
- Salt tank overflowing
- Irregular or weak brine flow
- Softener not regenerating properly
Cleaning or replacing the brine line will clear obstructions. You’ll also want to start a manual regeneration cycle to flush the softener after clearing any clogs. Preventive maintenance by inspecting and cleaning the brine line biannually can help avoid clogs.
Damaged Control Valve
The control valve directs the backwash, brining, rinsing, and refill processes during softener regeneration. Broken valve parts, damaged gears, or electrical failures can lead to a malfunctioning control valve. This causes irregular regeneration and may result in overflowing tanks.
Signs of a faulty control valve include:
- Softener not regenerating on schedule
- Constant water flow in and out of the tanks
- Improper backwashing or rinsing
You’ll need to disassemble and inspect the control valve to identify any broken or corroded parts. Replacement of the valve or its internal components is often required. Adjust any out-of-position valves and confirm proper sequencing settings too.
Stuck Float Assembly
The brine tank float rises and falls with the water level, shutting off the refill valve when the tank is full. If the float gets stuck, bent, detached, or weighed down with salt, it can’t stop the water flow. This leads to uncontrolled refilling and an overflowing brine tank.
Signs of a damaged float assembly:
- Brine tank overflowing
- Water constantly trickling into the brine tank
- Float that’s off-center, crooked, or loose
Carefully remove the float and inspect it for damage or blockages. Clean and straighten the float arm as needed. You may have to replace the entire assembly. Adjust the float height and refill level after reinstalling to prevent future overflows.
Low Salt Level in Brine Tank
Sufficient salt in the brine tank is required for proper softener regeneration. As the salt slowly dissolves, it creates the salty brine solution. If you neglect to check the salt level and the tank runs very low or empty, the softener can’t draw enough brine to fully regenerate the resin beads.
Hard water will then bypass into your plumbing system, which can cause backups and overflows. Keeping the salt tank over 1/3 full at all times is recommended.
Signs of an insufficient salt level:
- Salt tank level very low or empty
- Scale buildup on fixtures and pipes
- Tap water seems hard
Simply adding more salt pellets and running a manual regeneration restores softening. Schedule regular salt top-offs to maintain the needed salt level. Installing a salt level sensor is another preventive step to avoid low salt situations.
How to Troubleshoot a Water Softener Overflow
Once you notice water pooling around your water softener, taking quick action to diagnose the problem is crucial to prevent extensive damage. Use these practical troubleshooting tips to get your overflowing water softener back on track:
Inspect the Drain Line
The drain line is the most likely place you’ll find a clog or blockage leading to water softener overflow. Start here first when troubleshooting:
- Check the full length of the drain hose for kinks or flattened sections that could obstruct flow. The hose should have constant downward pitch.
- Examine where the drain line connects to the brine tank and softener. Sediment or salt buildup often clogs outlet ports.
- Remove the drain line and run water through it. Difficulty draining points to a clog. Use a drain snake to loosen debris.
- Flush clean water through the drain line to clear any dislodged obstructions.
- Reattach the drain line and test for proper drainage during regeneration cycles.
- Install an overflow bypass tube if overflows persist. This will redirect water away from the softener.
Inspect the Brine Line
If you find no issues with the drain line, next check the brine line:
- Disconnect the brine line from the softener and brine tank ports.
- Check for scale or debris clogging the inner walls of the line. Insert a pipe brush to clear any buildup.
- Blow compressed air through the line to dislodge stuck debris or salt.
- Reattach the line and test for strong suction when regenerating. Weak suction indicates remaining blockages.
- Replace the brine line if cleaning doesn’t restore flow. Use proper diameter tubing.
- Schedule biannual brine line inspection to keep the line clear.
Evaluate the Control Valve
If water overflow correlates with the regeneration cycle at night, the control valve should be inspected:
- Check valve displays and settings to ensure the valve opens and closes on the proper schedule.
- Observe the valve operation during a manual regeneration. Irregular flow indicates malfunctions.
- Inspect valve ports and gears for broken parts, wear, and corrosion. Clean or replace defective parts.
- Test valve electrical connections for shorts, damage, and loose wiring.
- Reset valve pistons to the correct positions if shifted out of place.
- Replace the control valve if repairs won’t restore normal operation.
Examine the Salt Tank Float
For salt tank overflows, the float that controls refill should be checked:
- Remove the float to check for cracks, dents, or other damage. Bent arms can prevent float operation.
- Ensure the float moves freely without obstruction. Clear any salt buildup.
- Adjust float height according to manufacturer specifications, if needed.
- Verify proper shut-off when the float rises to the full level.
- Replace the float valve assembly if damaged or incorrectly calibrated.
- Check the refill rate and set to an optimal 4-6 gpm range. High rates can overwhelm the float.
Check for Insufficient Salt
Finally, rule out insufficient salt levels by:
- Inspecting the salt tank to make sure it’s at least 1/3 full. Mark the minimum level.
- Adding salt pellets until the tank is full to within a few inches of the top.
- Running a manual regeneration to fully flush the softener with brine.
- Tasting your tap water to confirm softness is restored.
- Scheduling regular salt refills, such as once a month or when the salt level drops to the minimum mark.
With a few simple but strategic troubleshooting steps, you can quickly zero in on what’s causing your water softener overflow. Address any issues you find to get your softener working properly and avoid ongoing water damage.
How to Fix an Overflowing Water Softener
Once you’ve pinpointed what’s causing your water softener to overflow, you can move on to resolving the problem. Repair techniques will vary depending on whether it’s a clogged line, faulty valve, float issue or some other cause. Here are DIY methods to fix the most common water softener overflow issues:
Fixing a Clogged Drain Line
A clogged drain line is one of the most preventable causes of water softener overflow. Regular drain line maintenance helps avoid clogs and backups. Here’s how to fix a blocked drain line:
What You’ll Need:
- Drain snake
- Hose clamps
- Bucket
Steps:
- Shut off water to the softener and open the bypass valve to prevent more water entering the system.
- Loosen hose clamps and disconnect the drain line from the softener and brine tank ports.
- Run a drain snake through the drain line to break up sediment and debris.
- Flush clean water through the line into a bucket to clear any remaining loose debris.
- Inspect the drain line ports on the softener and brine tank for sludge buildup. Use a pipe brush to scrub the ports clean.
- Check for kinks or cracks in the drain line that may impede drainage. Replace if damaged.
- Reconnect the drain line. Make sure the line maintains a constant downward slope with no low spots where water could collect.
- Secure with hose clamps. Don’t overtighten.
- Close the bypass valve and slowly turn the main water back on to pressurize the system.
- Activate a manual regeneration and verify the drain flows adequately and doesn’t overflow.
- Schedule monthly drain line cleaning to prevent future clogs.
Fixing a Plugged Brine Line
Scale buildup and salt bridges are common causes of brine line blockages. Here’s how to clear obstructions:
What You’ll Need:
- Pipe brush
- Bucket
- Compressed air
Steps:
- Shut off water to the softener and close the bypass valve. Disconnect power if you have an electronic head.
- Remove the brine line from the softener and brine tank ports.
- Check for scale deposits inside the brine line. Scrub any buildup out with a pipe brush.
- Rinse debris out by flushing clean water through the line into a bucket.
- Blow compressed air through the brine line to dislodge any remaining particles.
- Inspect the brine line ports and scrub clean if needed.
- Reconnect the brine line. Make sure it’s securely inserted into the push-fit ports.
- Restore power and open the bypass valve slowly.
- Manually initiate regeneration and check brine flow strength. Weak suction indicates remaining clogs.
- Schedule biannual brine line cleaning to prevent future salt deposits and scale.
Fixing a Faulty Control Valve
Malfunctioning control valves often need full disassembly and cleaning or replacement of internal parts:
What You’ll Need:
- Valve repair kit
- Emery cloth
Steps:
- Shut off water and power to the softener. Relieve system pressure.
- Remove the valve cover and inspect the piston, gears, seal, spacers, and other internal parts for defects.
- Clean valve cavities and parts with emery cloth to remove deposits and debris.
- Replace any cracked, worn, or corroded parts. Use a valve repair kit for common parts like seals, spacers, and o-rings.
- Reseat pistons and ensure pistons move through proper cycles unobstructed.
- Check electrical connections for loose wires or damaged terminals.
- Reattach valve cover. Grease o-rings to ensure a watertight seal.
- Restore power and water. Allow the valve to cycle automatically and confirm proper operation.
Fixing a Damaged Float Assembly
Here’s how to clean and repair a malfunctioning brine tank float:
What You’ll Need:
- Clean rags
- Float clip pliers
Steps:
- Shut off water to the softener and brine tank. Depressurize the brine tank.
- Remove the float from the brine well. Inspect for cracks, dents, or salt buildup that impedes free movement.
- Clean the float with a rag to remove any encrusted salt. Bend the float arm back into proper position if needed.
- Ensure the float moves freely without getting stuck or bound up.
- Replace the entire assembly if the float or arm is damaged or keeps malfunctioning. Use float clip pliers to remove swollen clips.
- Reinstall the float at the proper preset level in the brine well.
- Adjust the refill rate if needed to 4-6 gpm optimal range.
- Slowly turn water back on and verify the float shuts off refilling properly as the brine tank fills.
With the right tools and Parts, many water softener repairs can be completed DIY without requiring a service call. But for complex overflow issues or control valve replacement, contact a water treatment Professional for assistance.
How to Prevent Water Softener Overflows
Once you’ve stopped an overflow and fixed the underlying problem, it’s equally important to take preventive steps to avoid future water backups and damage. Here are smart maintenance tips that help minimize the chances of water softener overflow:
Schedule Regular Maintenance
- Inspect the brine tank salt level weekly and refill as needed to keep over 1/3 full. Mark minimum level.
- Check the drain line every 1-2 months to ensure it’s clear of sediment and debris. Flush clean water through it.
- Clean the brine line every 6 months by disconnecting and scrubbing mineral deposits.
- Have a technician service the control valve annually to keep it operating properly year-round.
- Replace air checks, seals, and o-rings every 3-5 years per manufacturer recommendations.
Optimize Settings & Components
- Adjust brine draw/refill rates to 4-6 gpm optimal range. High rates can overwhelm components.
- Use proper tube diameter for drain hoses and brine lines. Avoid crimping or sagging.
- Upgrade to demand-initiated regeneration to avoid overflow during unused cycles.
- Install an overflow bypass tube to redirect water away from the softener in event of backup.
- Limit water use during softener regeneration cycle at night when capacity is lowered.
Smart Installation Tips
- Keep the softener in a protected area not prone to freezing, which can damage components.
- Raised softeners on a concrete pedestal prevent salt corrosion and water damage if leaks occur.
- Use a hose clamp on drain line connections instead of push-fit fittings that can pop loose.
- Apply thread sealant to threaded fittings on the bypass valve and float assembly for watertight seals.
- Insulate brine and drain lines in unconditioned spaces to avoid freezing and bursting.
Know When to Call a Professional
- For frequent softener overflows despite troubleshooting.
- Control valve repairs needed beyond DIY capabilities.
- Salt tank float replacement if clip removal is required.
- Installation of water leak detection devices that shut off water during overflows.
By incorporating these best practices into your water softener maintenance routine, you can minimize the risk of malfunctions leading to overflows, water damage, and costly repairs down the road. Investing a little time up front goes a long way toward softener protection.
Final Thoughts
As a homeowner, an overflowing water softener can create a stressful and worrisome situation. Standing water where it doesn’t belong is never a good sign. Fortunately, most softener overflows can be diagnosed and repaired with the right information and a few tools.
Common fixes like clearing clogged lines, replacing faulty valves, and adjusting floats are manageable for DIY-ers. Preventive maintenance steps also keep your softener running smoothly and halt many problems before they start. For more serious or persistent overflow issues, don’t hesitate to call in a water treatment professional.
We hope this guide gives you increased confidence to troubleshoot and maintain your water softener. Just remember – a periodic overflow doesn’t necessarily mean a total softener failure. With attention and care, your unit should continue reliably softening water for years to come.